Archive / documented results
Old Photo Restoration Examples
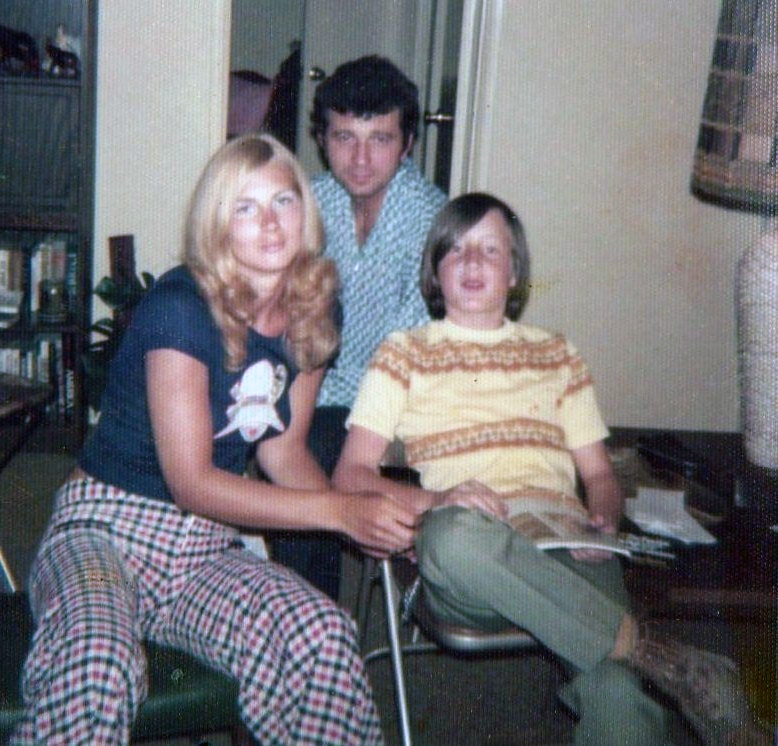
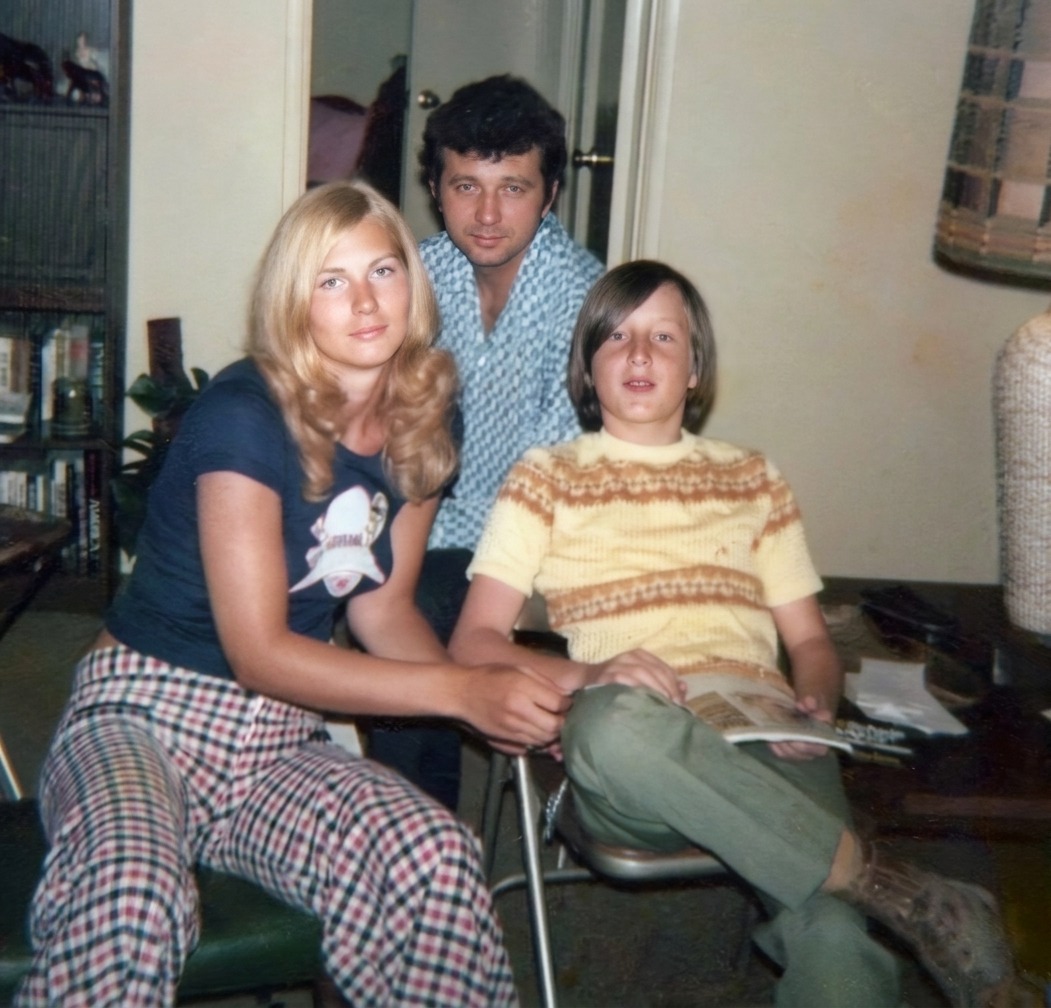
Side-by-side comparisons can show how tone, damage, and readability change while leaving the viewer free to judge whether the draft remains faithful. A gallery cannot promise the same result for every source; damage severity, scan quality, image size, and surviving evidence materially change the outcome. Keep the untouched scan beside the result.
- 3 free previews a month
- No signup
- Ready in minutes
- One payment — nothing to cancel
How it works
Upload your photo
Drop in a scan or phone photo of the damaged print. Your original is never touched, and there's no signup.
Preview it free
See the restoration beside your photo in about a minute. Drag the slider and judge it for yourself before you spend a cent.
Keep what you love
Pay only for the results worth keeping, then download them in full resolution.
Preview your photo — freeWhat to know before restoring this photograph
Start by separating the condition of the physical object from the appearance of its digital copy. For photo restoration examples, that means noticing scratch repair, fade recovery, colorization, grain reduction, and reconstruction each need a source image that honestly demonstrates the relevant limitation. This first inventory prevents a dramatic edit from hiding evidence that could matter later.
A useful comparison keeps crop, scale, and source consistent, and identifies when a result includes interpretive reconstruction rather than recovered detail. Understanding that mechanism sets realistic priorities: first restore legibility, then consider cosmetic cleanup that does not erase useful context.
Evaluate examples from the original high-resolution scan, not a recompressed screenshot, and inspect both the entire composition and sensitive facial regions. Make two backups before editing, and never overwrite the capture that records the object as found.
Side-by-side comparisons can show how tone, damage, and readability change while leaving the viewer free to judge whether the draft remains faithful. Work in stages when several problems overlap, comparing each draft with the raw file before moving on.
A gallery cannot promise the same result for every source; damage severity, scan quality, image size, and surviving evidence materially change the outcome. This limit is not a failure of scanning; it is an honest boundary wherever source information no longer exists.
When several copies survive, compare them before editing photo restoration examples. One may preserve faces while another retains an uncropped border or stronger background. A careful composite can draw on genuine evidence from both, but record that method explicitly instead of presenting the result as a single untouched exposure. The source-specific checkpoint is this: A gallery cannot promise the same result for every source; damage severity, scan quality, image size, and surviving evidence materially change the outcome.
Write down where photo restoration examples came from while the answer is available. A box label, album position, donor, or penciled nickname may later resolve an uncertain date. Embed a short caption in the file record rather than adding permanent text across the restored picture itself. Its catalog note should also reflect the process history: A useful comparison keeps crop, scale, and source consistent, and identifies when a result includes interpretive reconstruction rather than recovered detail.
A useful handoff for photo restoration examples names the visible starting condition—scratch repair, fade recovery, colorization, grain reduction, and reconstruction each need a source image that honestly demonstrates the relevant limitation. Save the raw capture, restored master, practical sharing copy, and identification notes together. That package lets another relative distinguish surviving evidence from the choices made in this version.
Use the free editor preview to test this page-specific aim: side-by-side comparisons can show how tone, damage, and readability change while leaving the viewer free to judge whether the draft remains faithful. If the draft is worth keeping, pay only for the results you export. Payment covers an edit, not certainty about absent information; a gallery cannot promise the same result for every source; damage severity, scan quality, image size, and surviving evidence materially change the outcome.
Family photos that feel familiar
Start here: ordinary color and black-and-white family snapshots with fading and softness — not catastrophic damage. Every pair is genuine, unstaged engine output.
More kinds of repair
Portraits and prints with scratches, spots, blur, texture or color loss. Every pair is a genuine engine result made from a documented public-domain source.
Severe damage and reconstruction
These are the difficult edge cases. Missing regions are reconstructed and may differ from the lost original — this is not the typical starting point.
Questions about photo restoration examples
Can AI reliably help with photo restoration examples?
It can draft useful repairs when the scan retains surrounding detail. A gallery cannot promise the same result for every source; damage severity, scan quality, image size, and surviving evidence materially change the outcome. Review the preview against the untouched source.
What scan quality is best for photo restoration examples?
Use the best-generation source available. For most paper prints, scan in color at 600 dpi; use higher resolution for tiny prints and a dedicated film scan for negatives or slides.
Will the editor change the original photograph?
No. The workflow edits an uploaded digital copy. Fragile, moldy, stuck, or flaking originals need safe physical handling before any capture.
How much does a restoration cost?
Previews are free, and you pay only for restored photos you decide to keep; there is no promise that every severely damaged area can be recovered.
Should I keep the unedited scan?
Yes. Store the raw scan separately, give the restoration a new filename, and note when important regions were reconstructed or colorized.
See what your photo can become
Upload it, preview the restoration free, and keep only the result that feels right.
Preview your photo — free- 3 free previews a month
- No signup
- Ready in minutes
- One payment — nothing to cancel